



“Cheeks-B-Gone”
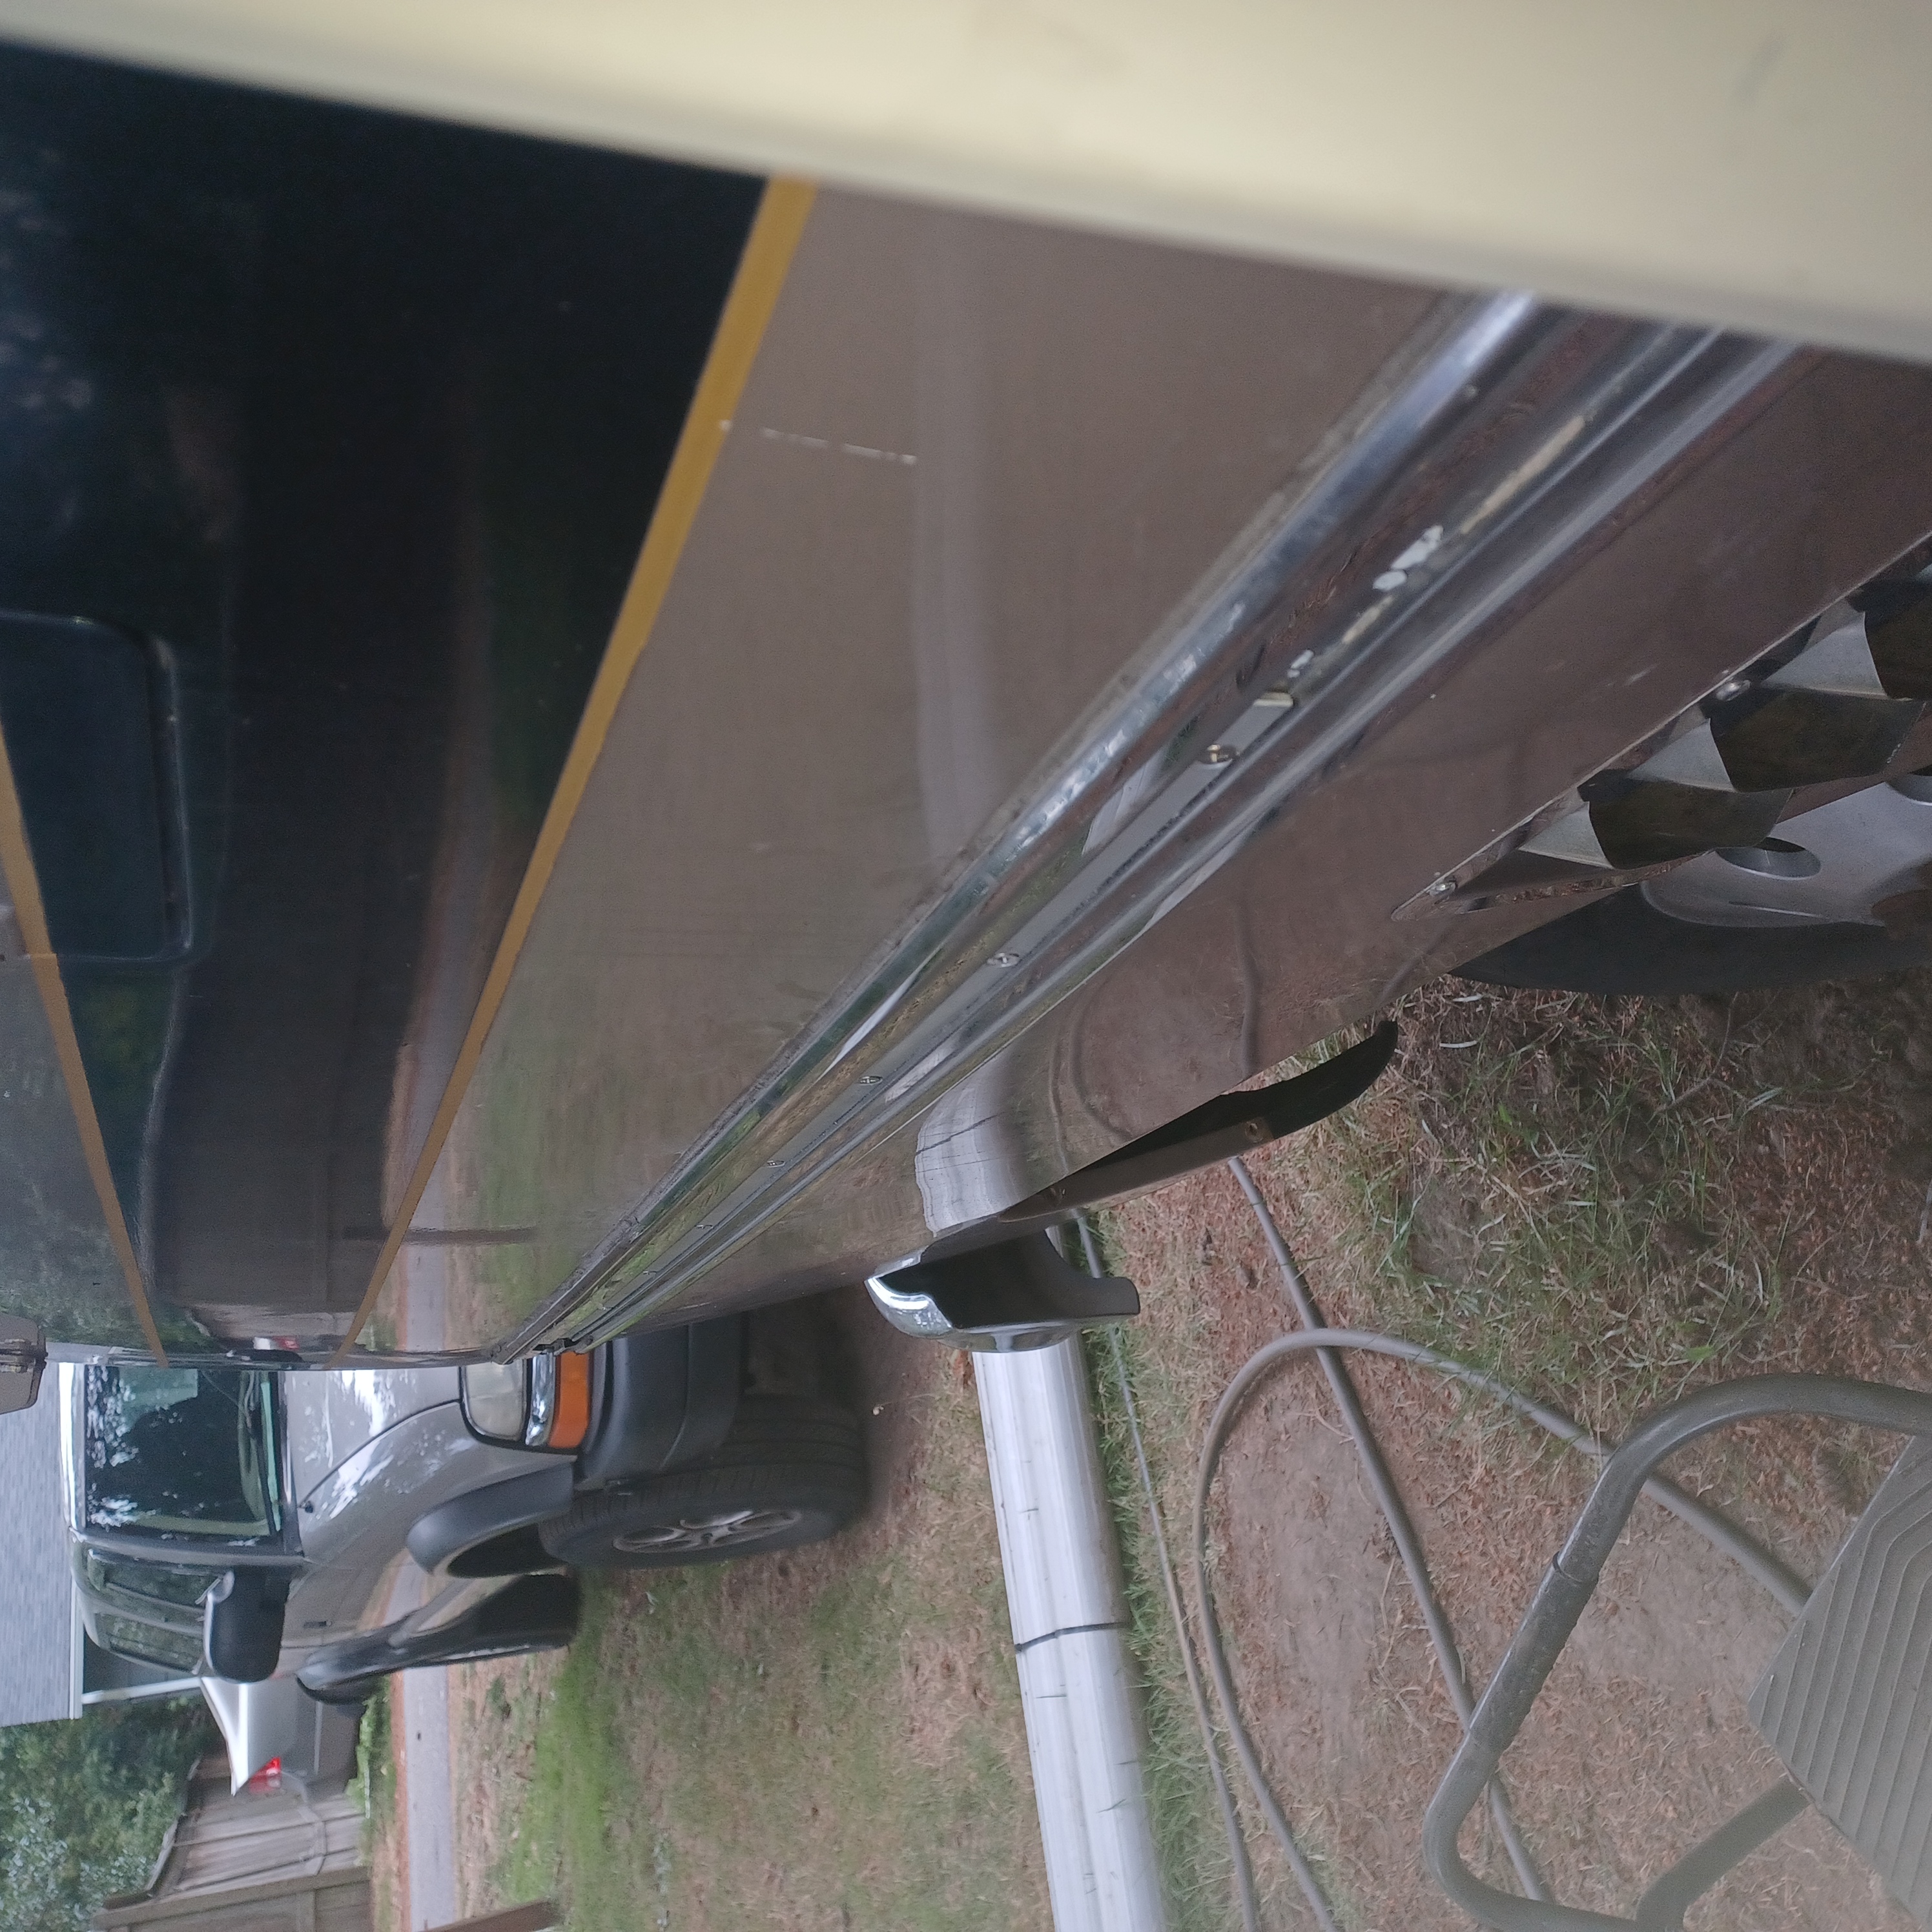
This kit applies to all models of GMC Motorhomes built from 1973 thru 1978. This kit pertains to the repair of the “Chipmunk Cheek” effect that age and gravity have placed on these coaches. It describes the separation/delamination of the outer body panel from the forward cockpit floor. GM's “bright idea” back in the day was to use glue/adhesive as an approved standalone method of attachment in certain areas, but they never factored in that these coaches would still be around ~50 years later. What age and gravity have left us with are coaches with pudgy cheeks and a spread out front tooth profile. Some coaches are more pronounced than others, but it's safe to say that this probably affects just about every one in some way or another. This kit remedies addresses the pudgy cheeks. An optional kit that corrects the front lower chin profile is available. When done correctly, this kit can be considered a permanent fix. It's not rocket science, and it will take some careful teamwork and effort and, most of all...patience, but you can do this. It's not real easy, but also not super hard. You just have to pay close attention and don't get ahead of yourself. Having a great assistant is recommended as well. The process runs a whole lot smoother with 2 people.
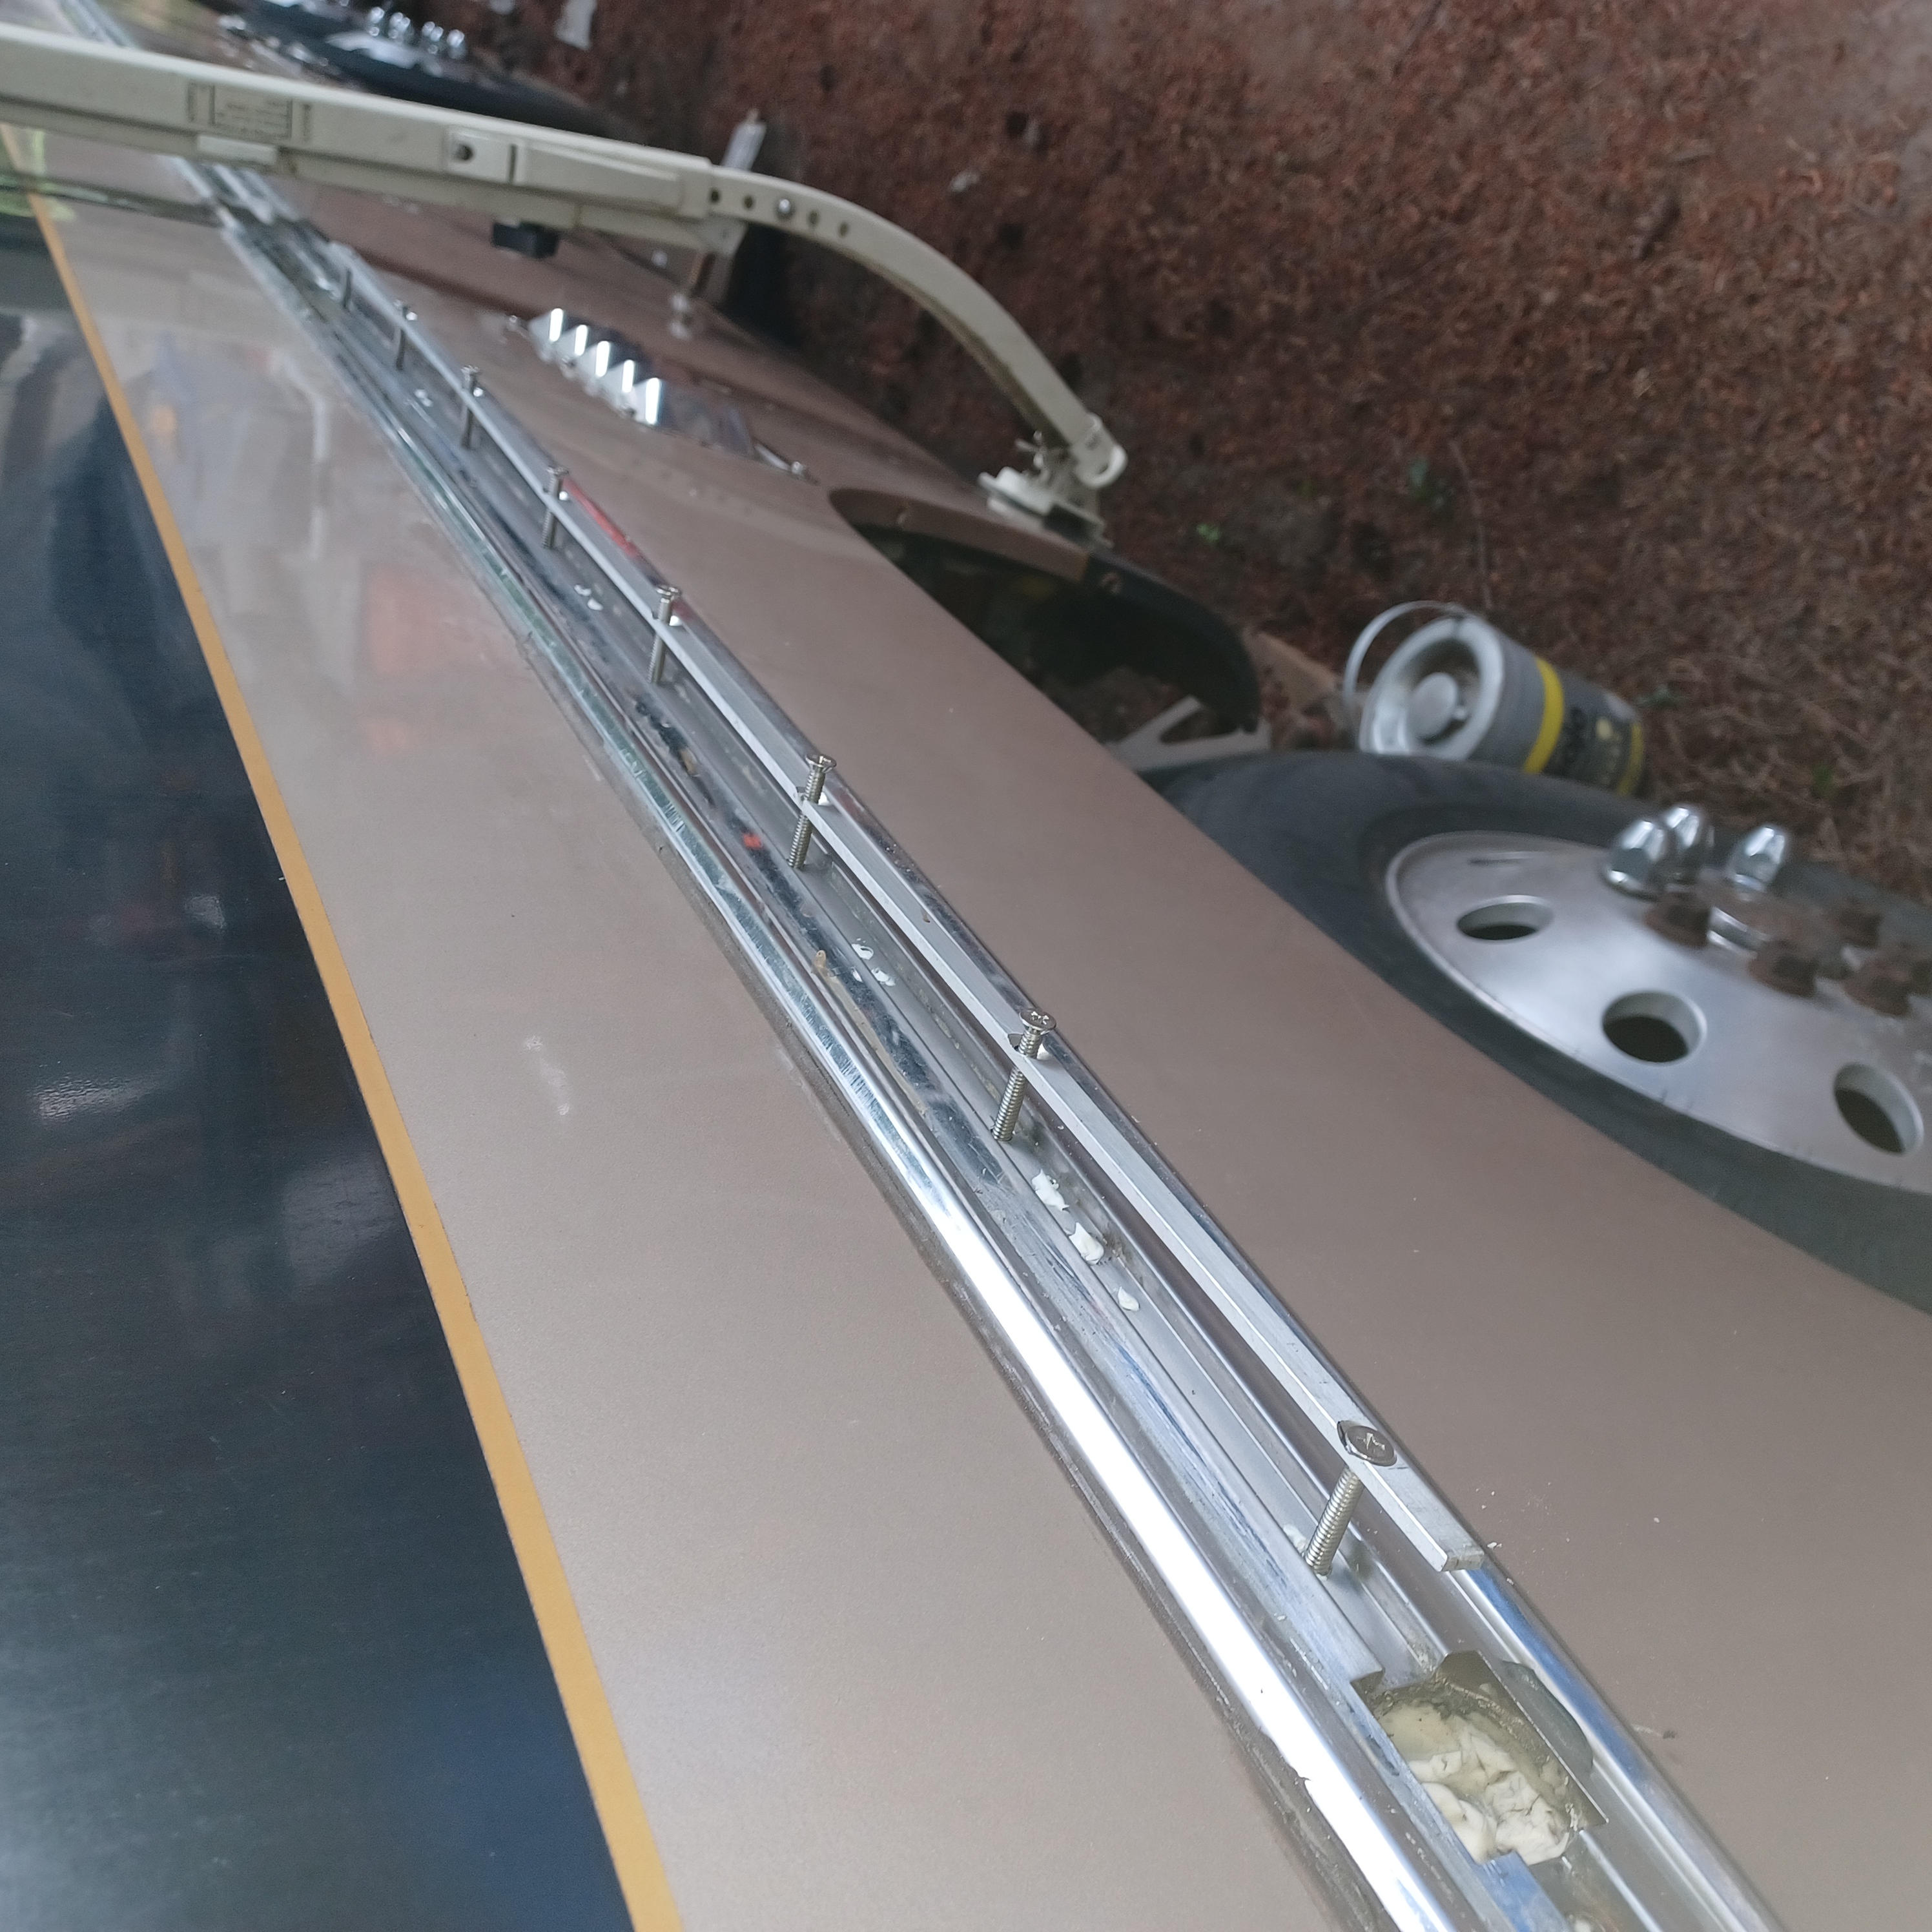
Ideally, this kit is best suited for the individual who is at the decision point of whether to refinish the outside and reattach the OEM stainless trim with new rubber molding, or do away with the stainless trim altogether and just mount brand new 2-3/4” rubber molding in the same position that the stainless was for a similar look. This kit will work either in the body seam directly, or with new trim installed. It is also possible to install this kit into the existing trim as long as you can peel back the first 38” of your rubber molding. The original rubber probably would not survive this as brittle as it is, but newer rubber can withstand flexing, removal and re-installation.
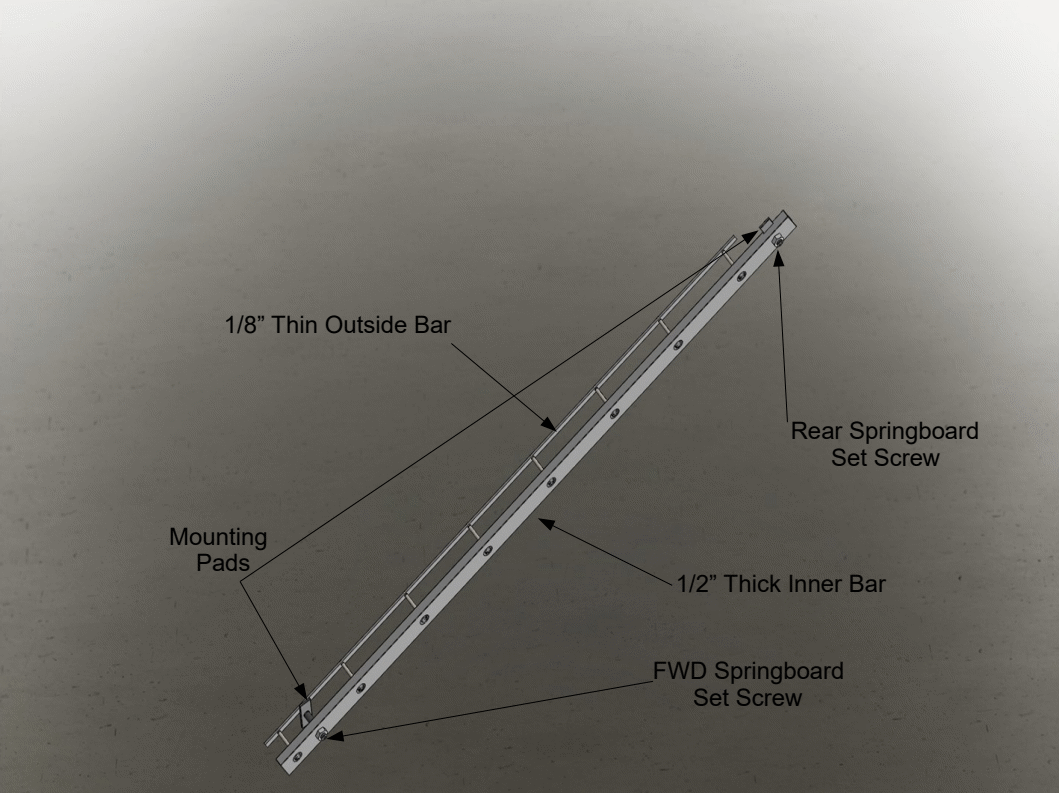
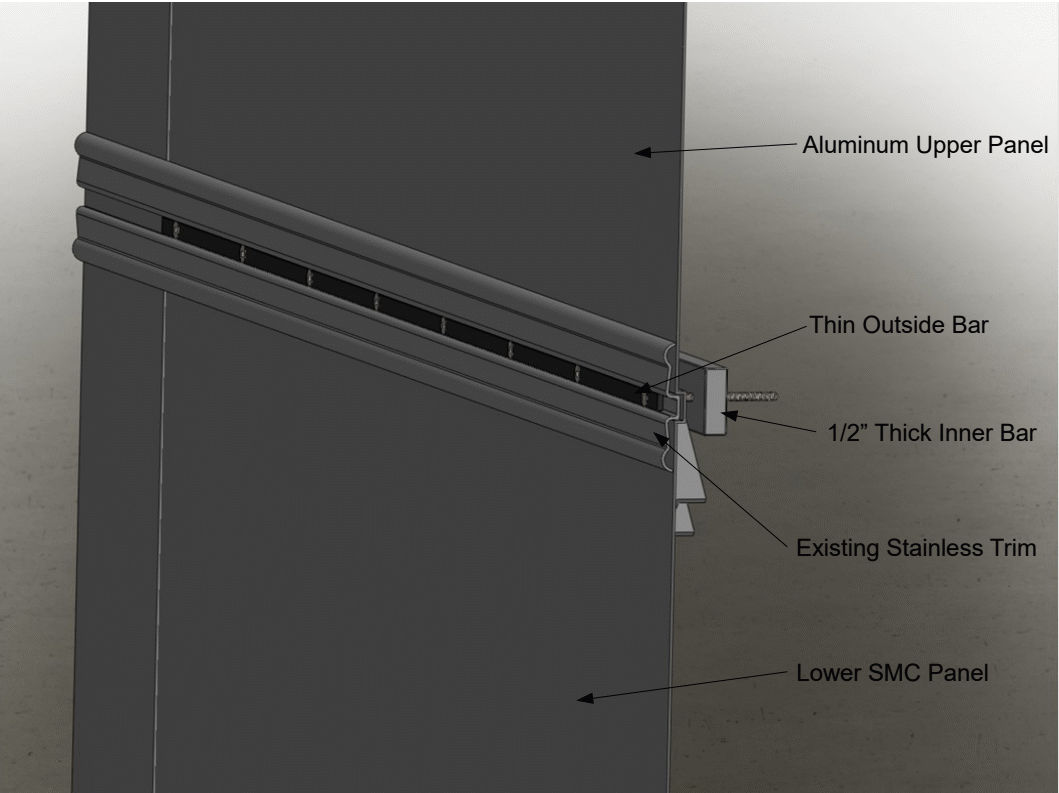
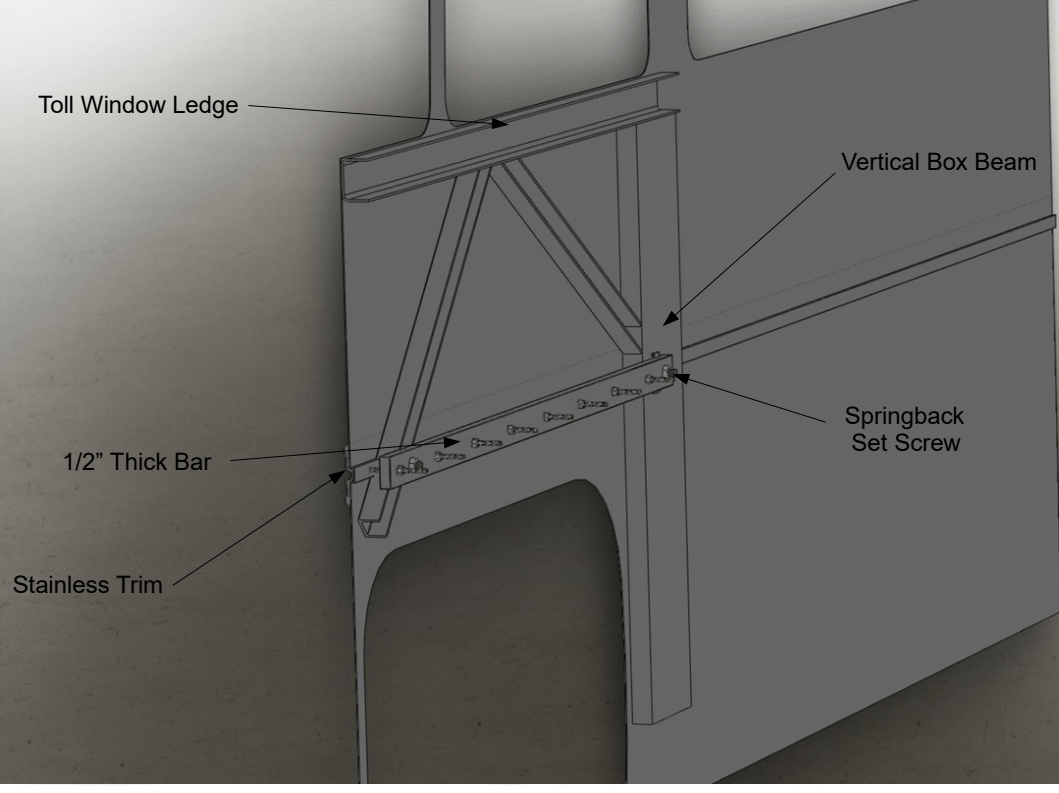
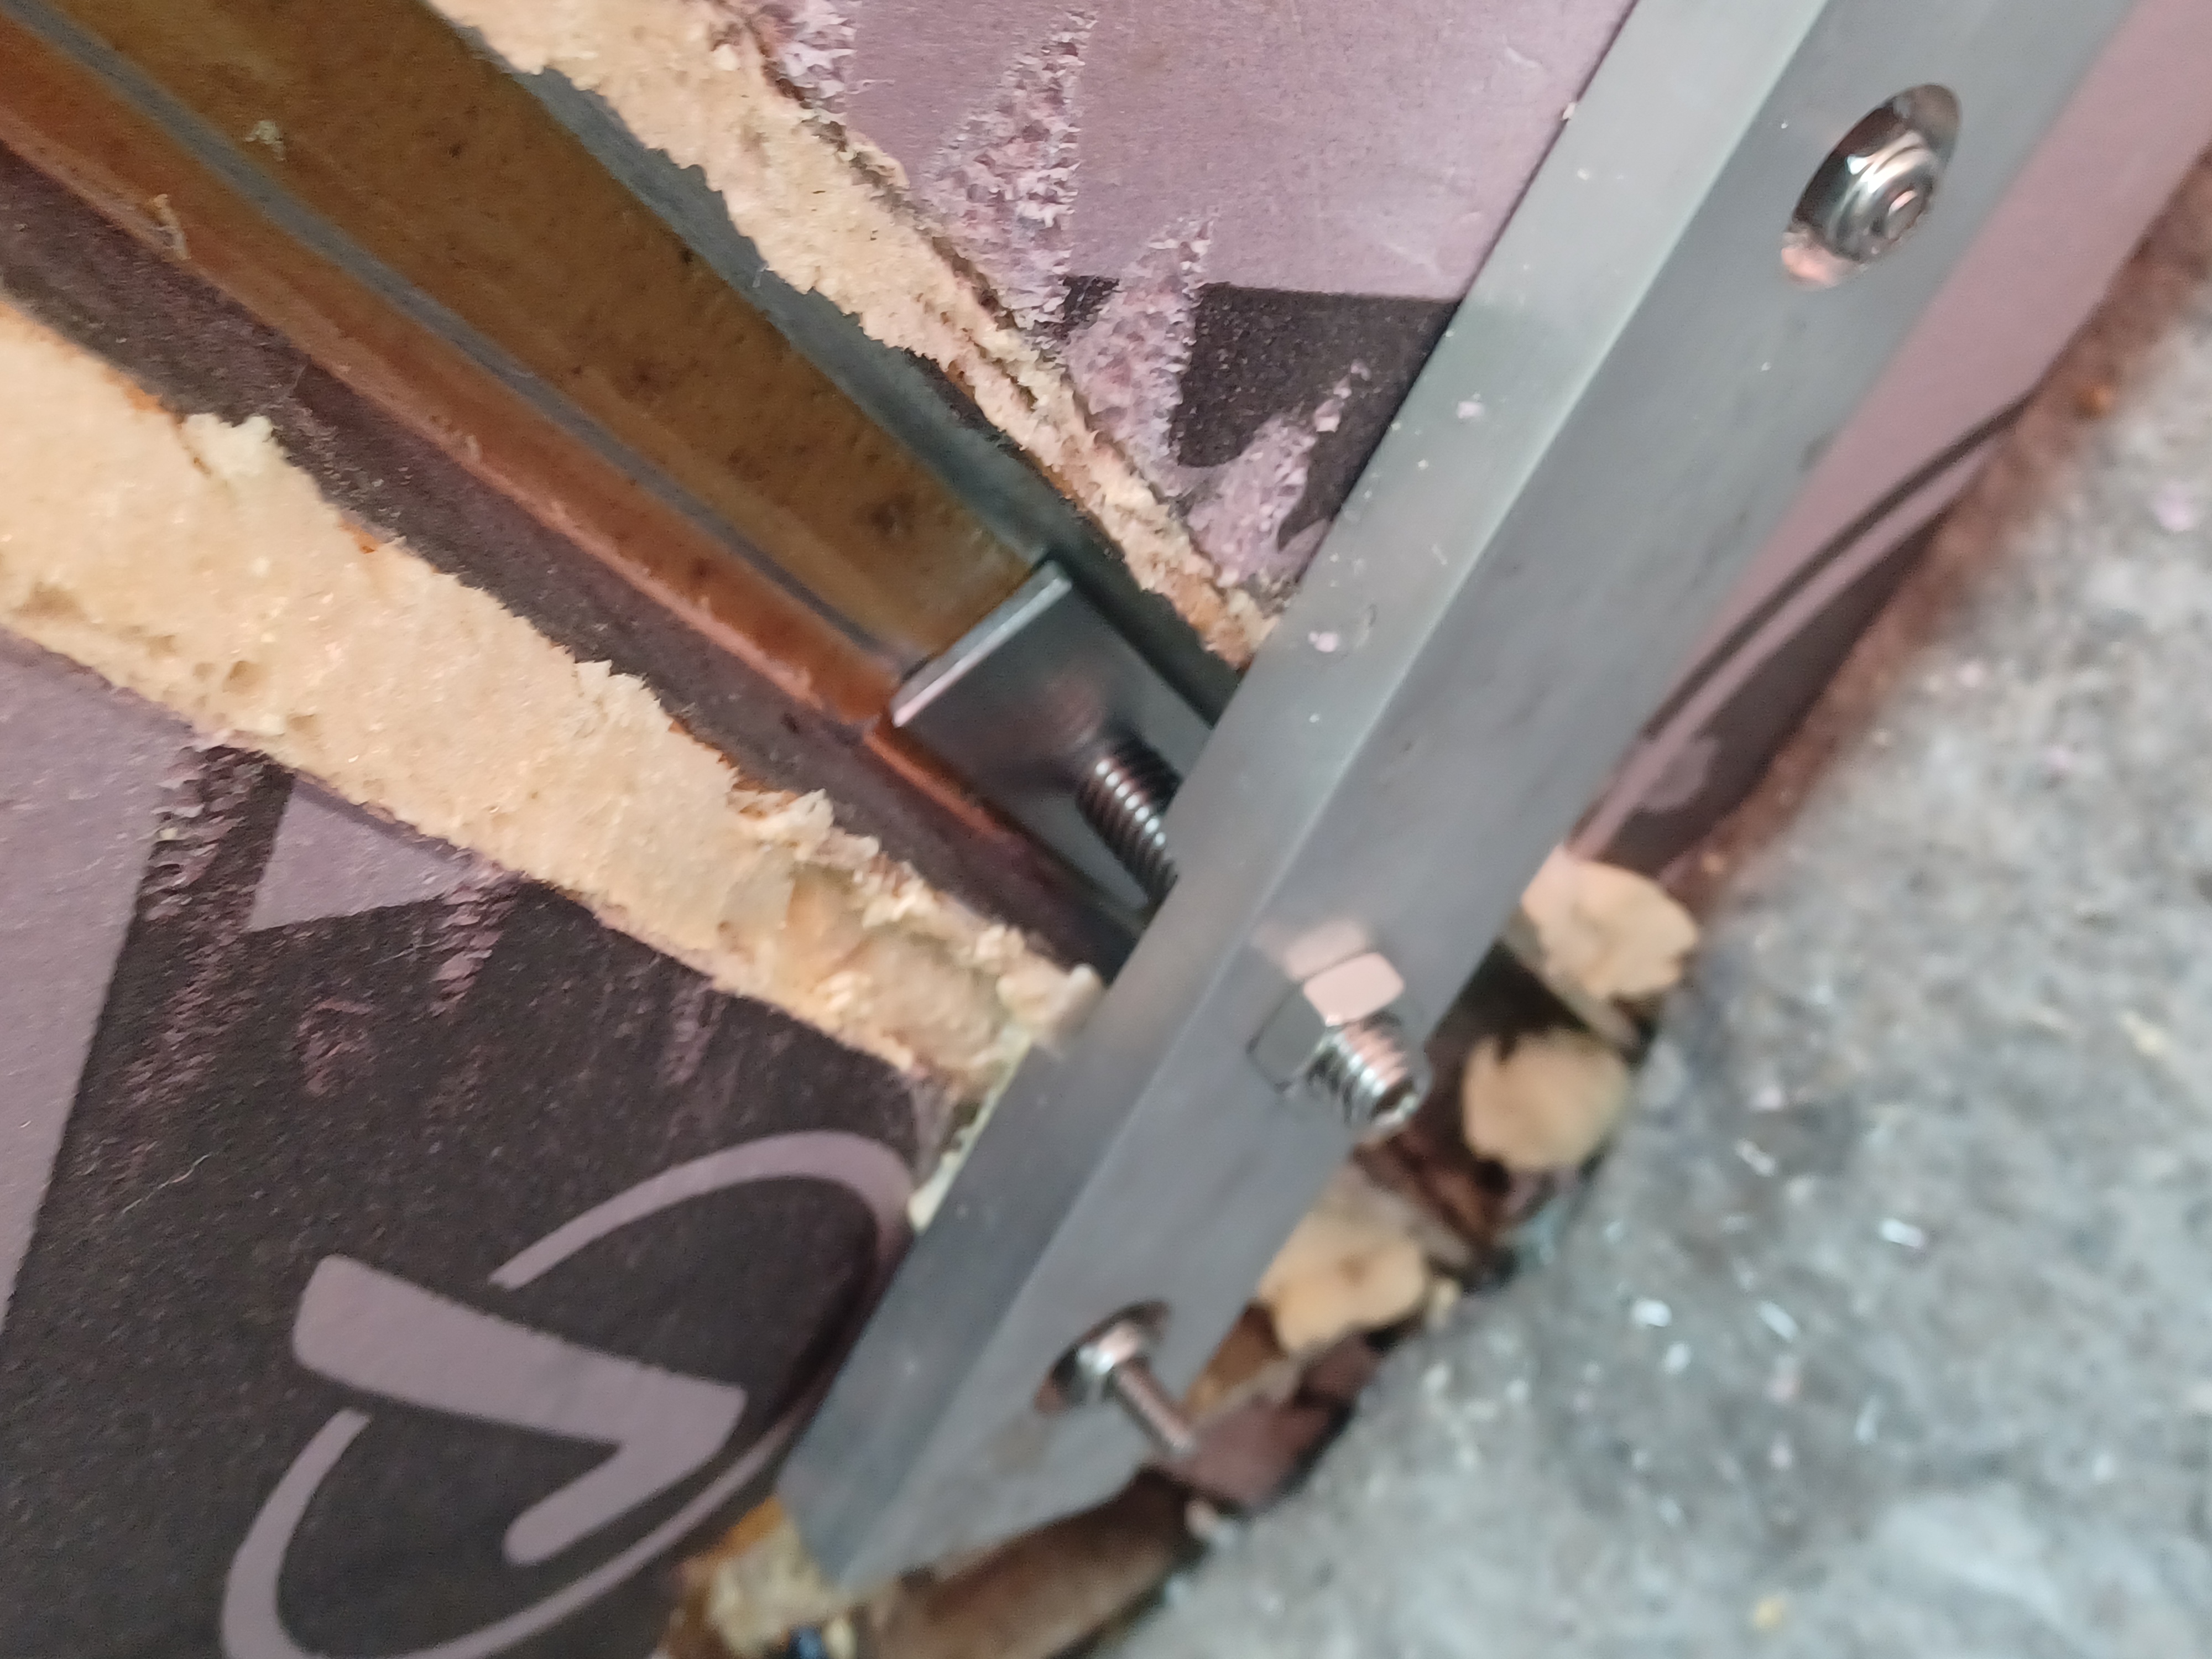
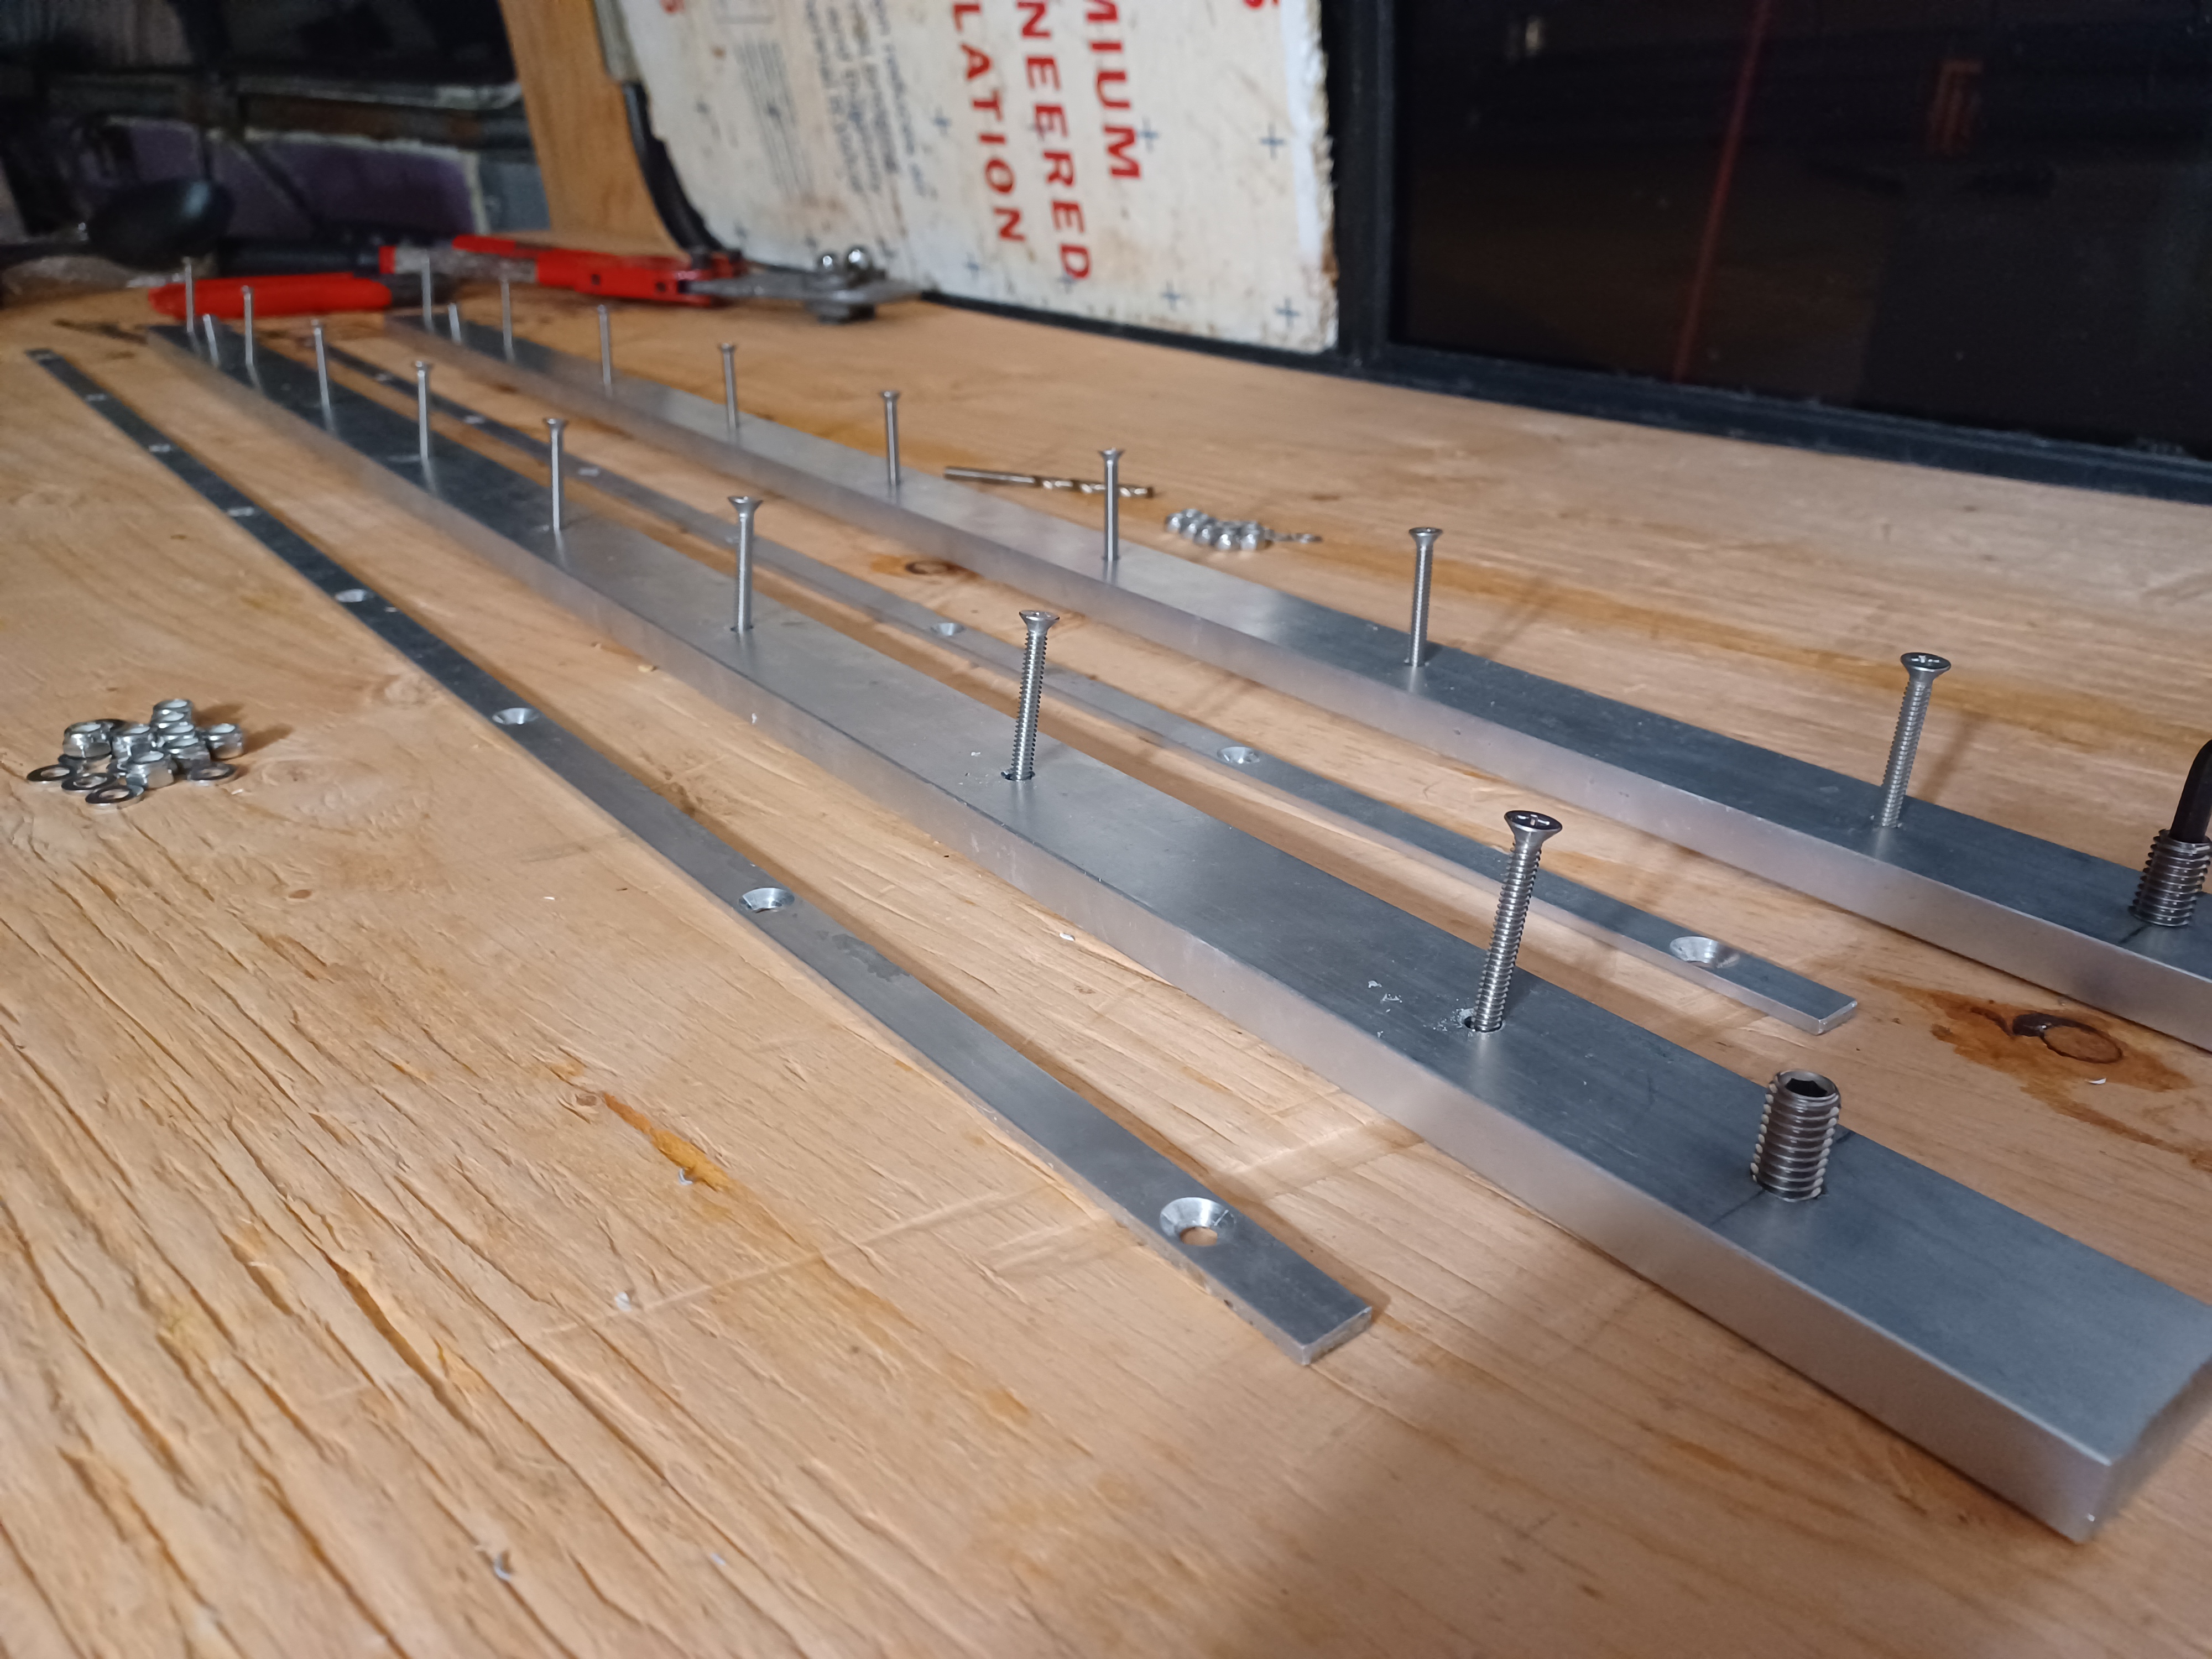
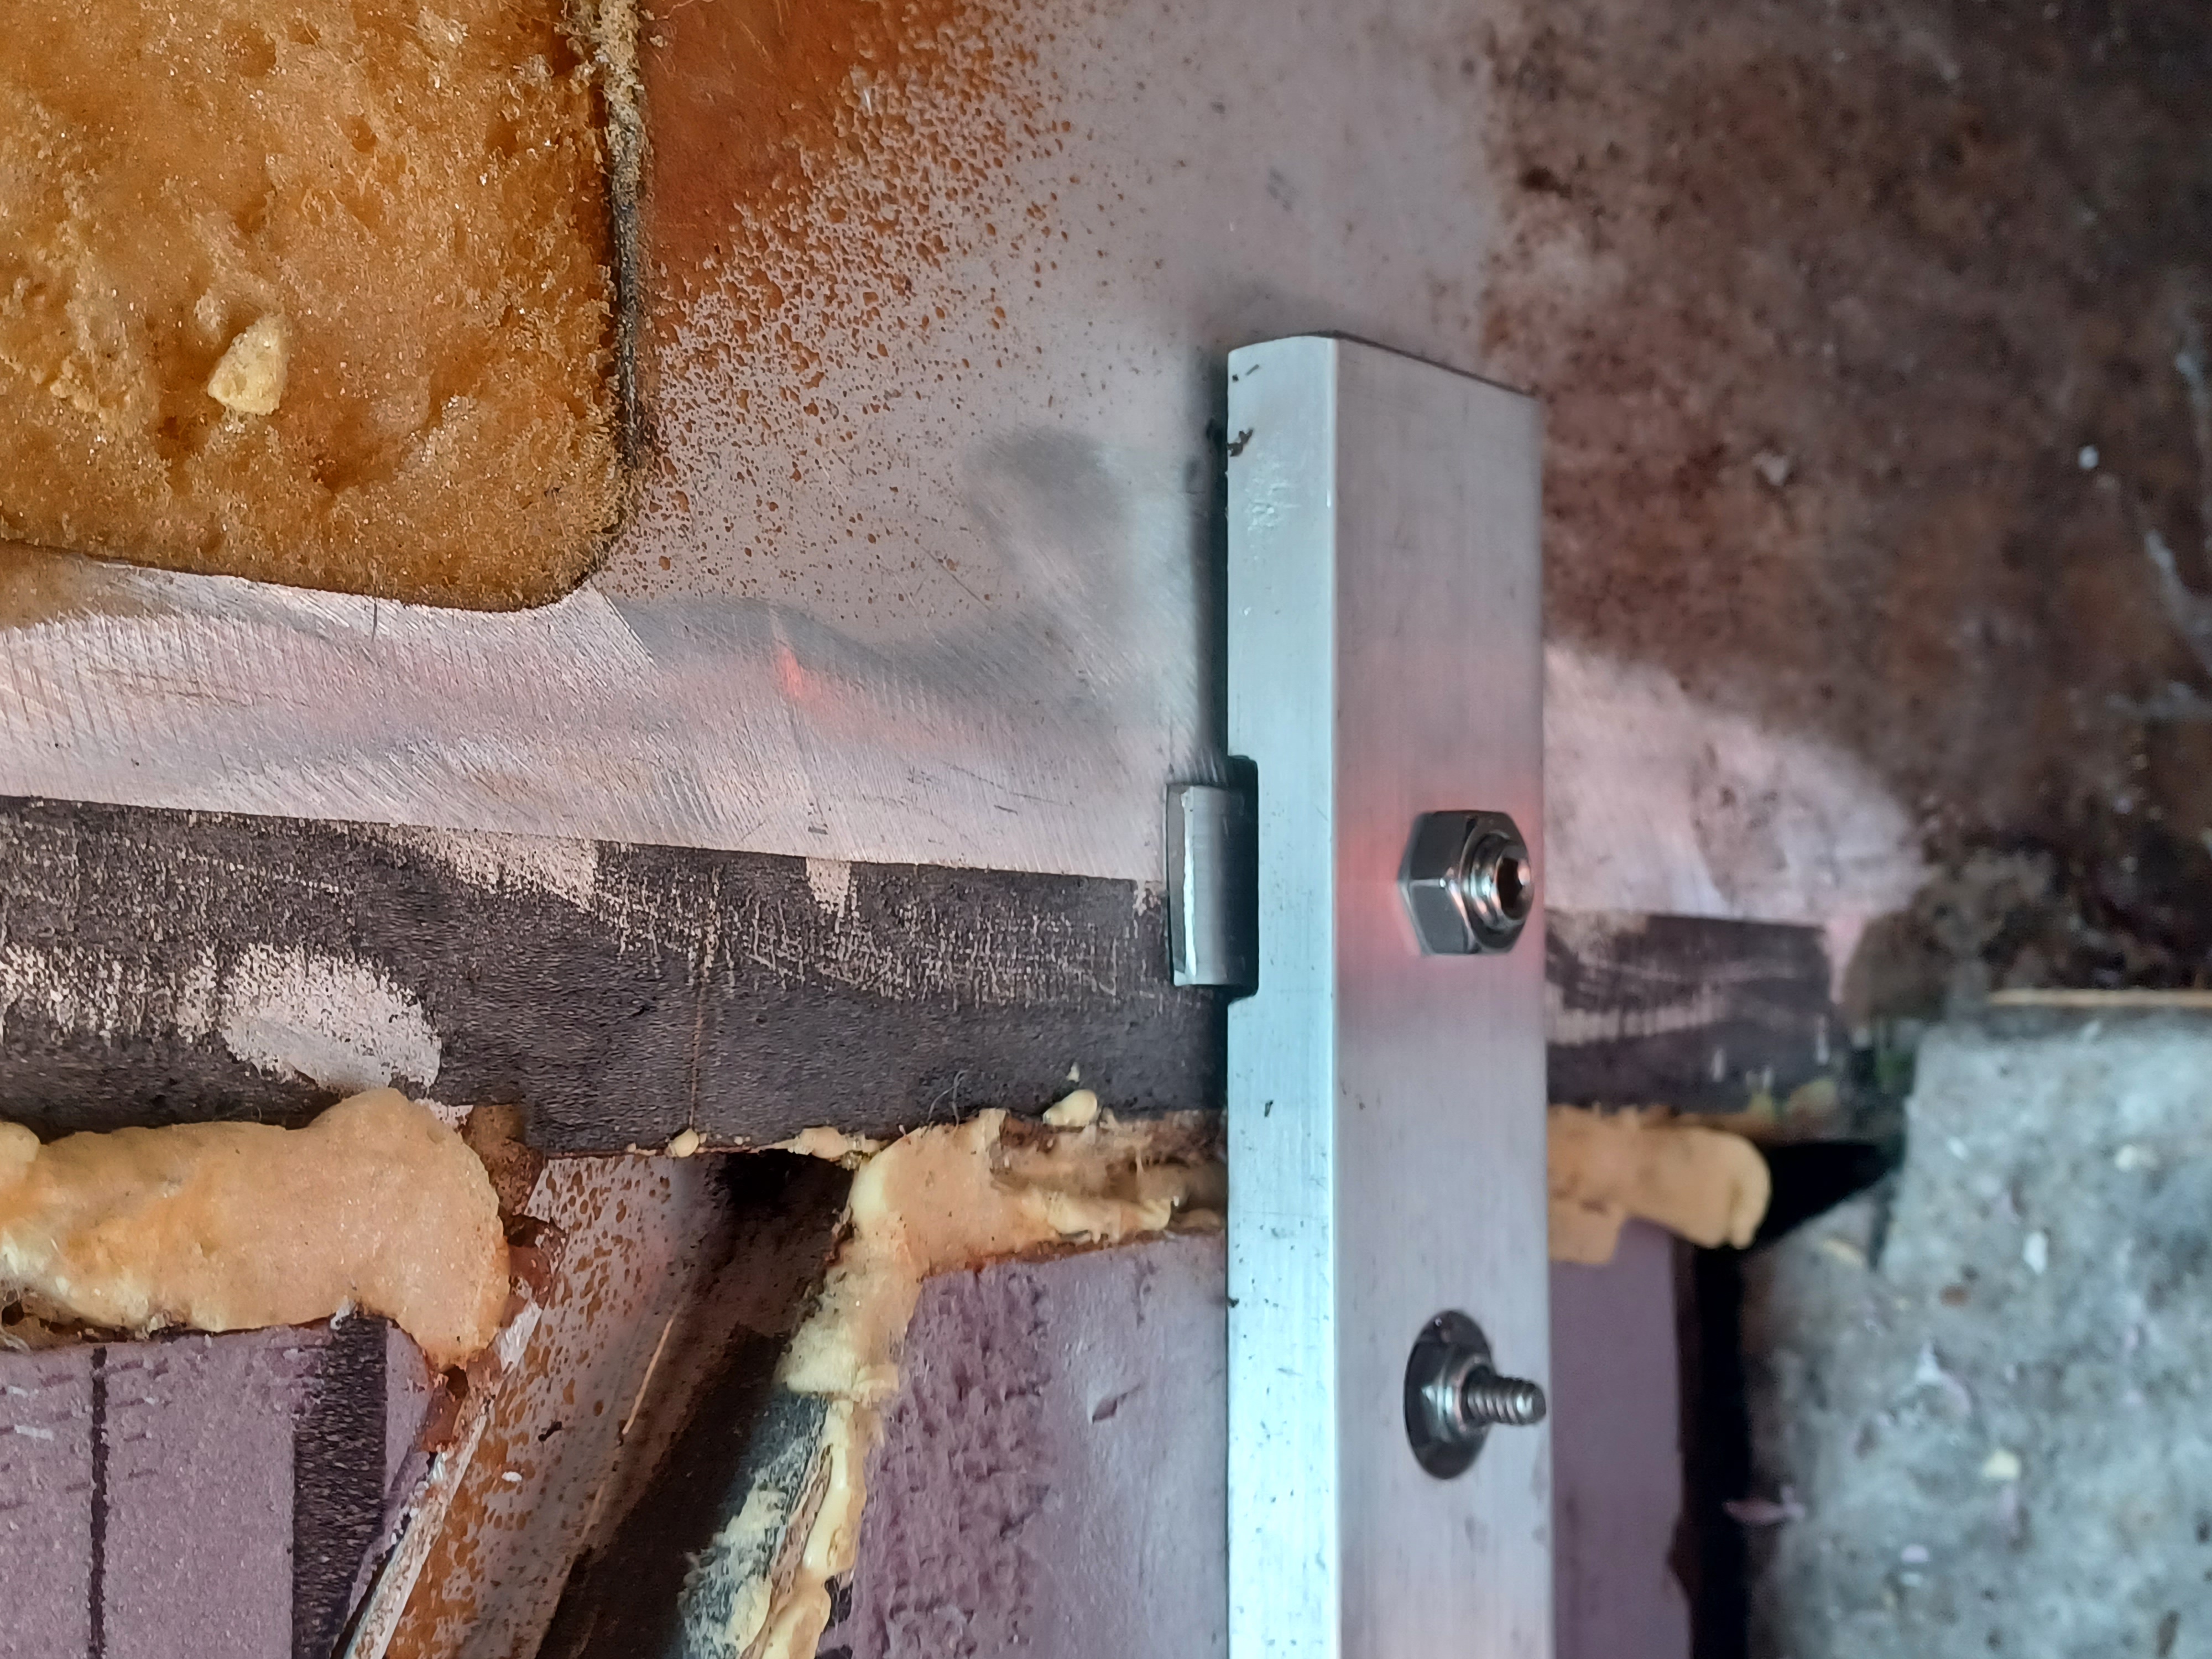
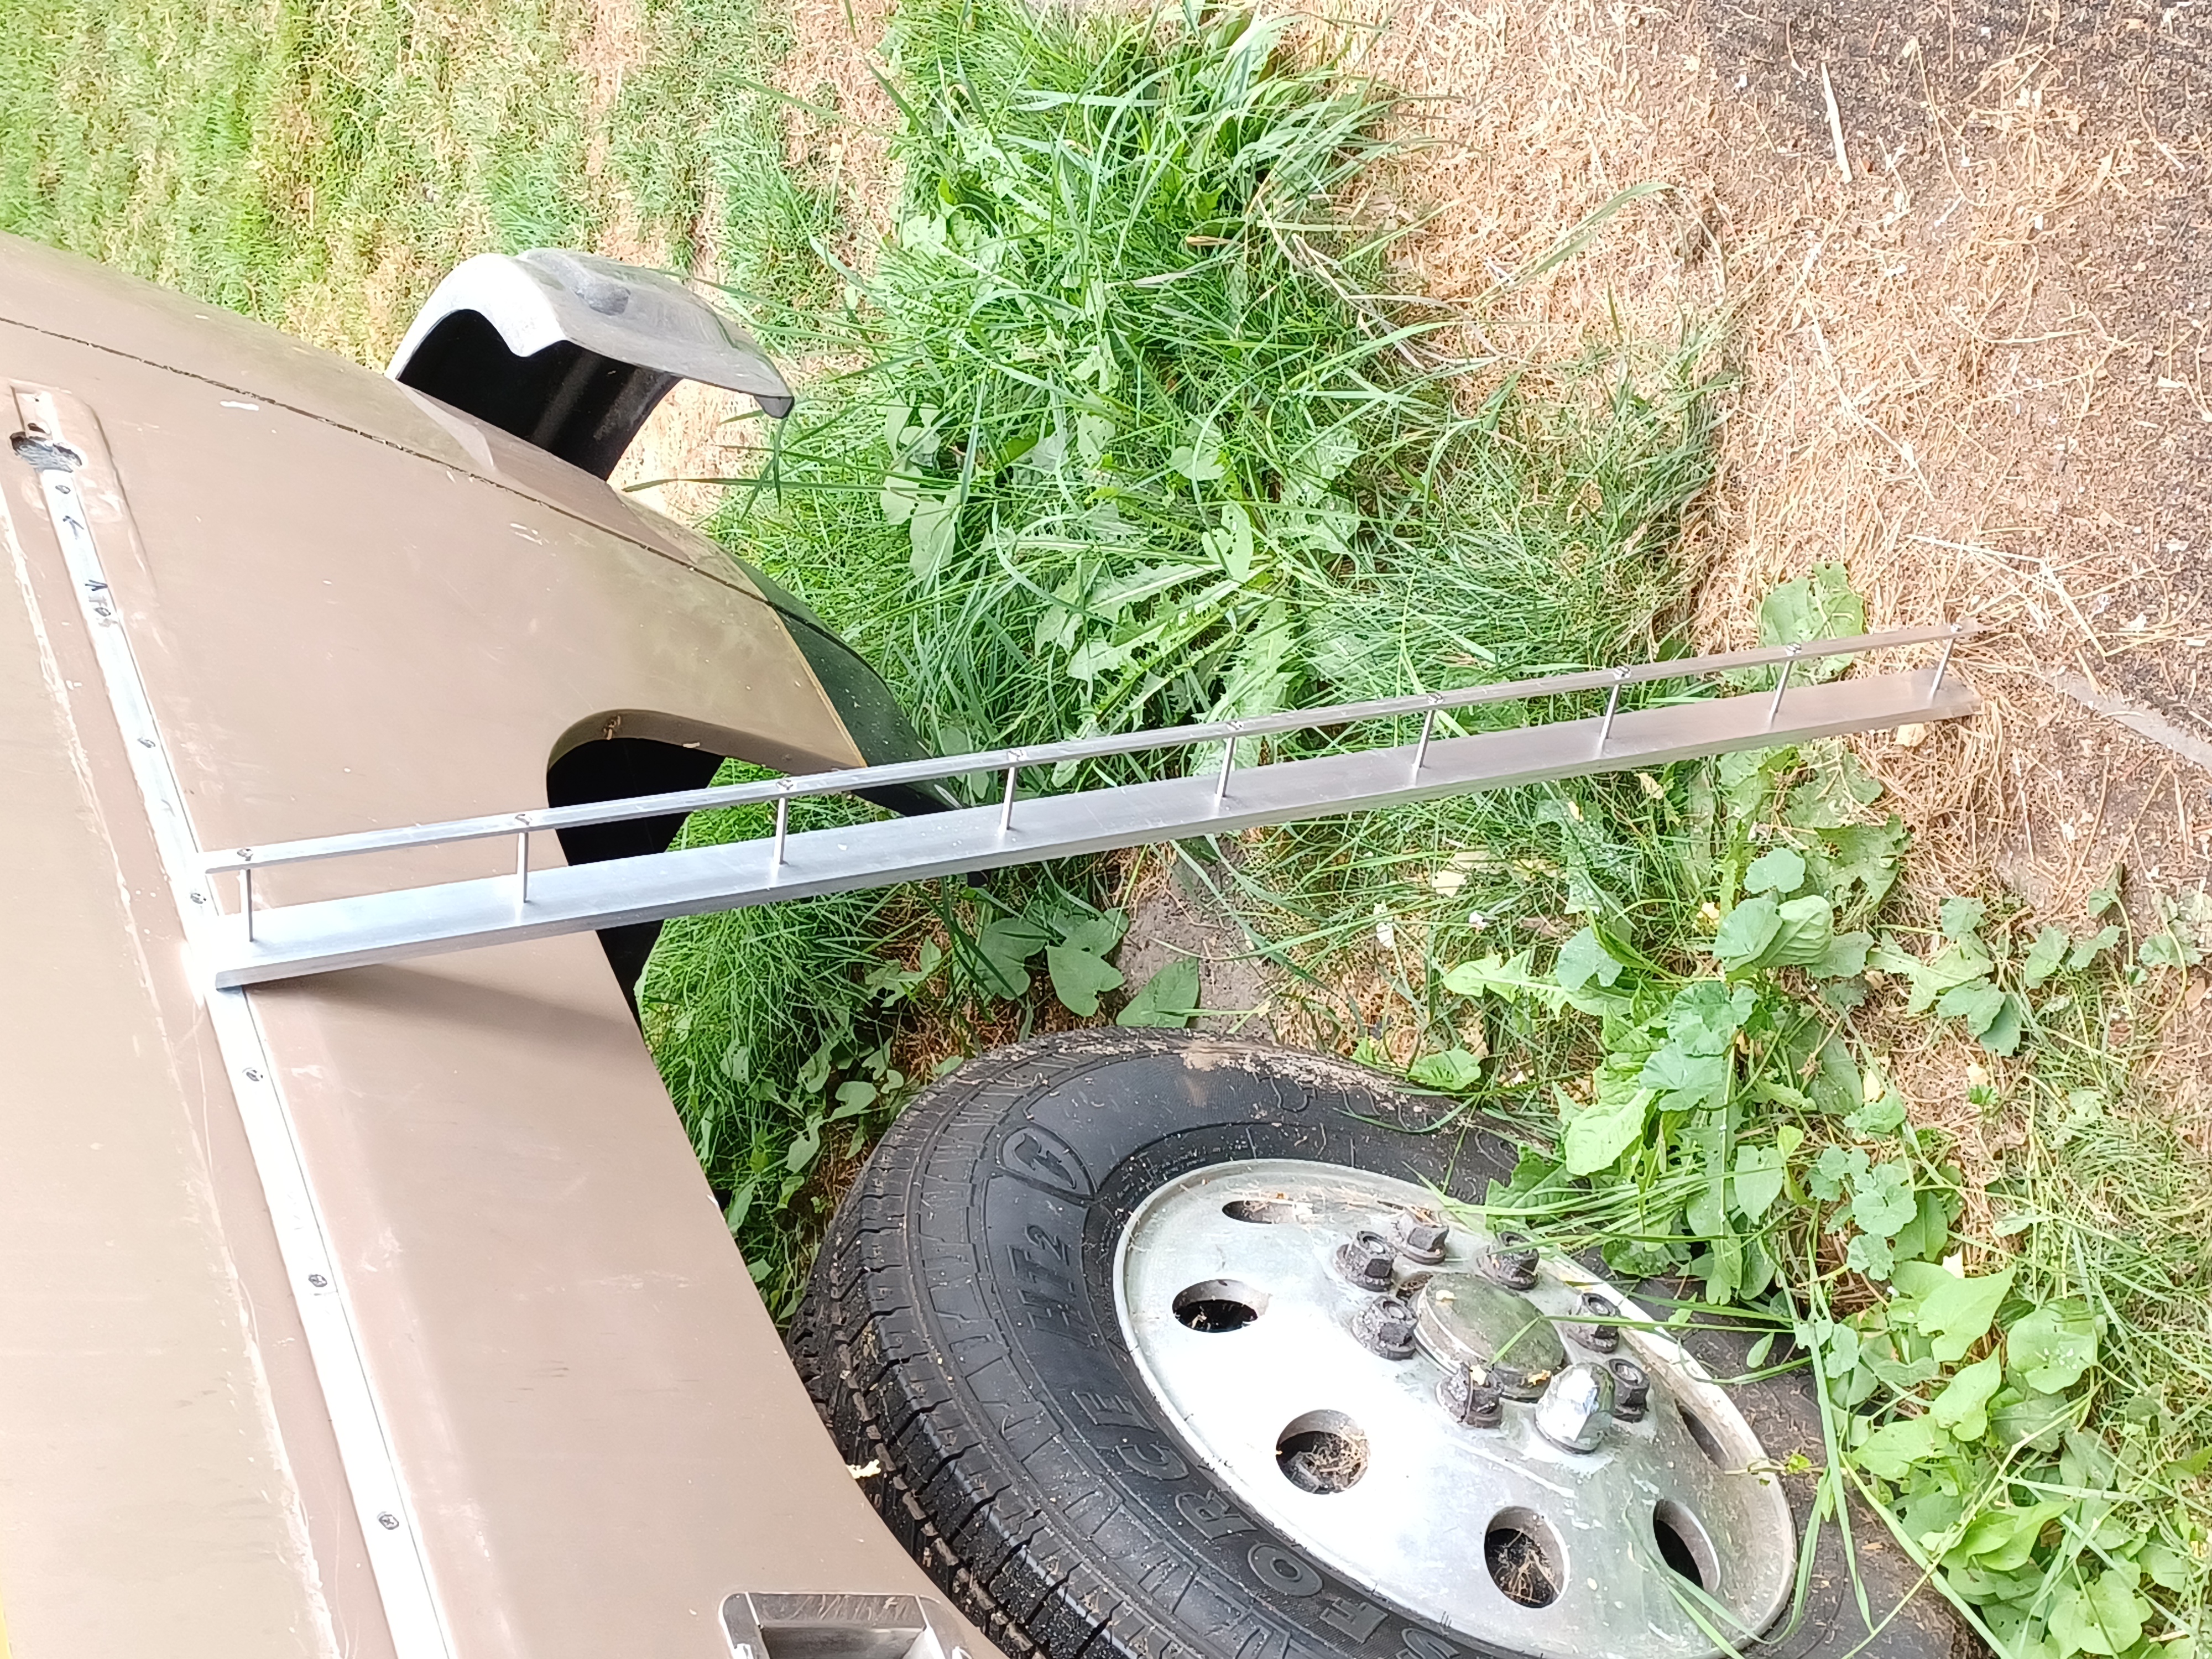
The kit consists of (two) sets of 2 machined aluminum bars of substantially different widths and thicknesses and lengths that are sandwiched through the coach wall together to form a linear clamp that forces the delaminated outer skin to return to its original profile against the cockpit floor. They are clamped together using stainless hardware. One pair/set for each side of the vehicle. The device works because the thicker inside beam is significantly stronger than the outside SMC panel and provides a firm anchor base from which to pull from. The screws then force the de-laminated skin inward towards the floor truss with tension from each of the 8 screws until it conforms to the original profile. The 1/2” bar tucks nicely against the side wall with no interference with the interior side panel. The outside beam is only 1/8th thick x 3/8” wide, so it nestles either inside either the stainless trim or the body seam by itself (if you decide to go that route). Hidden, but incredibly effective. The kit effectively corrals the bulge towards the center of the wheel well opening and then forces it back in towards the floor beams to assume it's original configuration. The hardware and springboard action make the fix permanent unless you change it.
|
|
|
You can replace the 1-9/16” rubber trim or the full width 2-3/4” molding with some of the new adhesive trim products that are available on the aftermarket today. They make them in widths that fit within the original stainless trim and look really nice. One good resource suggestion would be www.trim-gard.com. They fit very well and look really sharp.
It won’t be necessary to go to bare bones to install this kit as the kit is designed to be as informative as possible, but you will to have to remove your cockpit side panels. There's just no two ways around it. That in itself can be a project. You'll need to be able to access the lower section of the body panels right above and adjacent with the cockpit floor. As luck would have it, this area is directly behind your side panels and that’s what requires them to be removed.